Documentation
About Kubeapps
Tutorials
How-to guides
Step 1: Configure an Identity Management Provider in the Cluster 
The first step is to configure an OIDC provider ( VMware Cloud Service Portal (CSP) login in this example) in the VMware Tanzu™ Kubernetes Grid™ (TKG) cluster and configure Pinniped to trust this provider for authenticating Kubernetes API calls.
Step 1.1: Configure an OIDC Provider 
TKG comes with Pinniped installed by default; you only need to configure an OIDC provider and then make Pinniped trust that OIDC provider. The OIDC provider is responsible for authenticating users in the TKG cluster and the Kubeapps dashboard. The steps below use the VMware Cloud Services Platform (CSP) as an example; however, a similar process applies to any other OIDC-compliant provider, including Google Cloud, Azure Active Directory, Dex, Okta, and others.
NOTE: You need a recent version of Kubeapps (2.3.3 onwards), otherwise, you would need to install an additional Pinniped (version 0.6.0 onwards).
NOTE: If your cluster is already attached to VMware Tanzu™ Mission Control™ (TMC) an additional Pinniped version is automatically installed in another namespace. However, this guide always uses the Pinniped version installed by TKG (not by TMC).
Create an OAuth2 Application 
Begin by creating an OAuth2 application to retrieve the information required by Pinniped and, later on, Kubeapps. Follow the steps below:
NOTE: You must have Developer access in the organization to perform these steps. Also, note that if the organization is restricted, only users belonging to this organization are able to log in.
Navigate to the CSP Console at https://console.cloud.vmware.com .
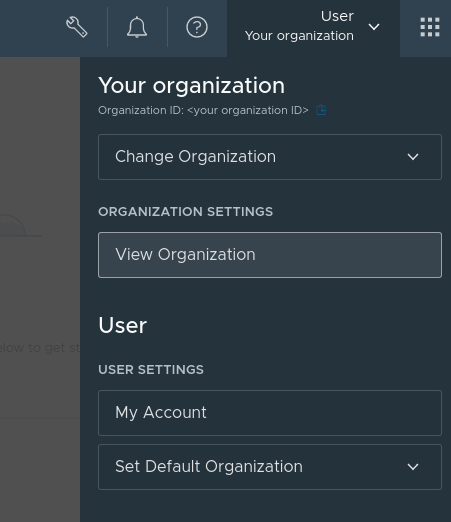
Click the drop-down menu in the top-right corner.
Under the Organization settings, click View Organization.
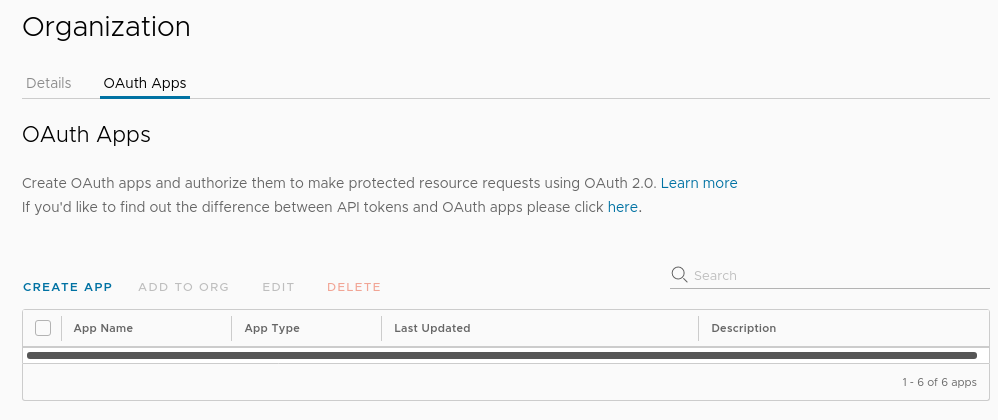
Click the OAuth Apps tab.
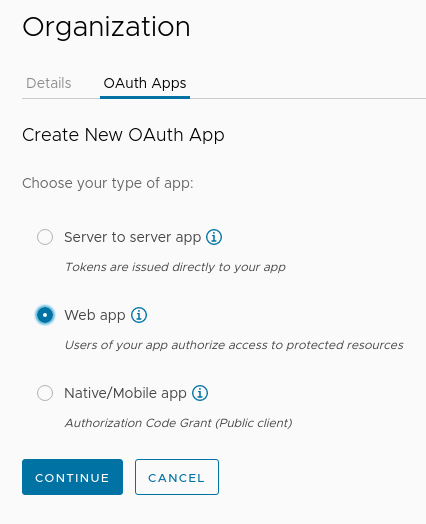
Select Web app and click the Continue button.
Enter a name and description for the OAuth app. For the moment, enter the value
https://localhost/oauth2/callbackin theRedirect URIsfield (this will be updated after Kubeapps is installed).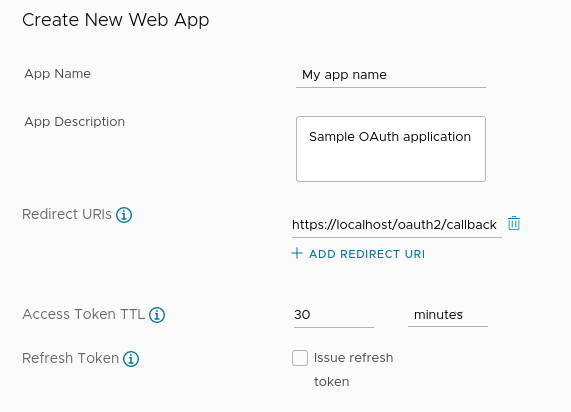
Leave the rest of the options at their default values.
Tick the
OpenIDcheckbox and click the Create button.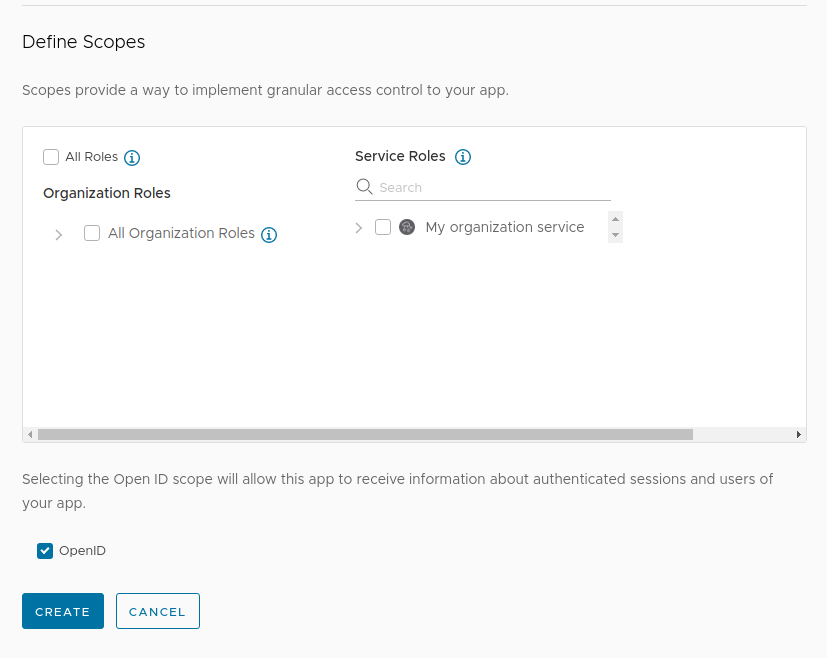
The CSP Console displays a success screen with an auto-generated application ID and secret. Click the Download JSON link to download these values.
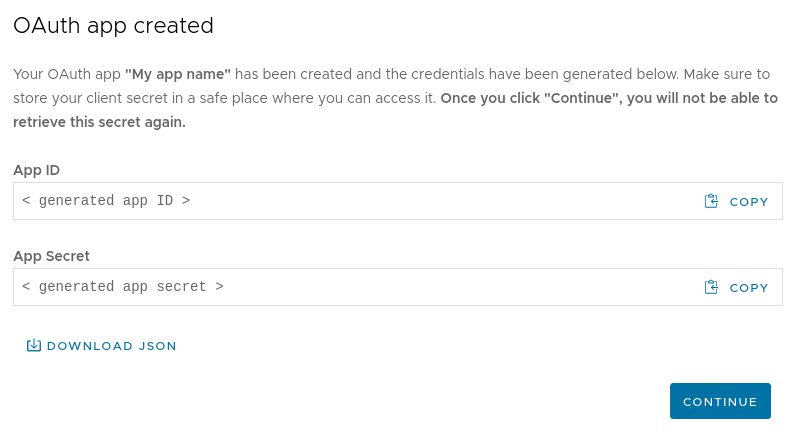
NOTE: Store this file carefully as it contains important credentials which are needed when configuring Pinniped and Kubeapps.
TIP: Any OIDC-compliant provider should expose a
.well-known/openid-configuration( example ) endpoint where you can find other useful and required information. This endpoint allows using the base URL to discover the rest of the URLs (authorization,token,end session,jwksandissuer) automatically. For CSP, the endpoint ishttps://console.cloud.vmware.com/csp/gateway/am/api.
At this point, an OAuth2 application is configured.
Configure Pinniped to Trust the OIDC Provider 
Once the OIDC provider has been fully configured, the next step is to configure Pinniped to trust this provider. This implies that a successful authentication with the OIDC provider results in authentication with the TKG cluster.
Since Pinniped manages this process, the only requirement is to have a JWTAuthenticator CustomResource in the cluster. To do so, follow the steps below:
Create a file named
kubeapps-jwt-authenticator.yamlwith the following content. Replace the placeholders as follows:- Replace the
OIDC-ISSUER-URLwith the issuer URL of the OIDC provider. For CSP it ishttps://gaz.csp-vidm-prod.com. - Replace
CLIENT-IDwith the application ID obtained from the JSON file in the previous step.
---
apiVersion: authentication.concierge.pinniped.dev/v1alpha1
kind: JWTAuthenticator
metadata:
name: kubeapps-jwt-authenticator
namespace: pinniped-concierge
spec:
issuer: OIDC-ISSUER-URL
audience: CLIENT-ID
claims:
   username: email
   groups: groups
#   tls:
#     certificateAuthorityData: LS0t... # optional base64 CA data if using a self-signed certificate
The
namefield specifies the name of the JWTAuthenticator resource, which is required in the next step.NOTE: Ignore the
tlssection of the configuration shown above unless the OIDC uses a self-signed certificate. If it does, follow these additional steps .NOTE: Just if you are using the Pinniped version provided by TMC (instead of the one already provided by TKG), the line
namespace: pinniped-conciergemust be removed.- Replace the
Install the JWTAuthenticator resource in your cluster:
kubectl apply -f kubeapps-jwt-authenticator.yamlTIP: When using more than one workload cluster, apply this JWTAuthenticator resource in every cluster.
At the end of this step, an identity management provider has been configured in the cluster. The next step is to install Kubeapps .

 Slack
Slack GitHub
 X
X